Forms Module
- Introduction – what forms are used for
- Creating a form – builder and settings
- Field types – available types of fields
- Validation – required fields and formats
- Embedding on the page – code to paste
- Results and submissions – viewing and managing
- CRM integration – automatic customer creation
- Email notifications – confirmations and notifications
- Advanced settings – dates, anonymity, styles
Introduction
The Forms module allows you to create various forms that enable the collection of important information. With the intuitive builder, you can design a form according to your needs and place it on your website. The results are presented in a clear table, making it easier to analyze data and make decisions.
Forms can collect contact information from potential customers, information about submissions, errors, or complaints. They can also serve as an internal tool within the company, for example, to gather information from employees.
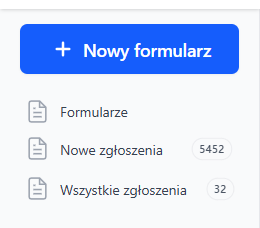
Creating a form
To create a new form, go to Submissions → Forms and click the New form button.
When creating a form, you can set:
- Name – internal name of the form (visible only in the panel)
- Fields – add fields for users to fill out
- Button text – e.g., "Submit", "Sign up", "Order"
- Response after submission – message or redirect to another page
Field types
Available field types in the form:
| Type | Description |
|---|---|
| Header | Section title of the form (not a fillable field) |
| Paragraph | Informational text, instructions for the user |
| Text field | Single-line field for short text (name, email, phone) |
| Multi-line field | Larger field for longer text (description, message) |
| Dropdown list | Select one option from a list |
| Radio buttons | Radio buttons – select one option |
| Checkboxes | Checkboxes – select multiple options |
| Attachment | File upload (documents, photos) |
Field validation
For each field, you can set:
- Required field – the user must fill it out
- Email format – checks the validity of the email address
- Numbers only – accepts only numbers (e.g., phone)
- Alphanumeric characters – letters and numbers
- Placeholder text – gray text visible before filling out
Embedding on the page
To place the form on your website:
- Go to edit the form
- Copy the general code – paste it once in the
<body>section of the page - Copy the form code – paste it where the form should be displayed
The form will automatically adjust to the style of your site. You can also add your own CSS classes.
Results and submissions
After the user fills out the form, the result appears in the Submissions tab.

Submission statuses:
- New – unread submissions (displayed in bold)
- Open – read but not yet handled
- Closed – archived, handled submissions
Operations on submissions:
- Archive – mark as handled
- Assign – to a person, team, or department
- Export to Excel – download all results as an XLS file
- Search – filter by form, date, content
CRM integration
Forms can automatically create or update customers in CRM. To configure this:
- In the form settings, enable Mapping to CRM
- Map form fields to customer fields (name, email, phone, company, etc.)
- Choose whether to create a new customer or update an existing one
This way, every submission automatically goes to the customer database.
Email notifications
You can configure two types of notifications:
- Team notification – email to a selected inbox when someone fills out the form
- Confirmation for the customer – automatic response to the email address provided in the form
In the content of notifications, you can use variables (e.g., name, submission content) that will be automatically filled in.
Advanced settings
Time activation:
You can set start and end dates during which the form will be active. Useful for campaigns, contests, event registrations.
Anonymity:
Enabling this option means that the system does not save the IP address, browser, or referring page. Useful for anonymous surveys.
Custom CSS styles:
You can add your own CSS classes to the form and the submit button to match the appearance to your site.
Response after submission:
You can choose what happens after the form is submitted:
- Display a thank you message
- Redirect to another page (e.g., thank you, offer)