SuperVoIP is a Polish provider of internet telephony (VoIP), offering modern communication solutions for businesses. Integration with SuperVoIP allows for a direct connection of the system with telephony, streamlining call handling and automating customer contact processes.
1. Activating the SuperVoIP API Service
Before you proceed with configuration, ensure that you have an active SuperVoIP API service in the SuperVoIP panel.
- Log in to the SuperVoIP panel.
- Go to:
Finance -> Packages and Services -> Services - Check if the SuperVoIP API is visible in the list of services.

If the SuperVoIP API service is not on the list:
- Click Add service (or the appropriate add button).

- Find and select the SuperVoIP API service.
- After adding, the service will appear on the list with the status Pending activation.

- Wait for the service to be activated by SuperVoIP. Until activation, you will see a waiting message in the API settings.

After the service is activated, you can proceed to configuration.
2. Configuration on the SuperVoIP Side
2.1. Setting up the Webhook
- Log in to the SuperVoIP panel.
- Go to:
Finance -> Packages and Services -> Services -> SuperVoIP API -> SuperVoIP API REST Settings - In the Webhook section, set the address:
https://voip.sugester.pl/voip/voips/supervoip
You can enter Sugester as the name and also check the call checkbox. - Click “Add webhook”.
The webhook is required for proper communication between SuperVoIP and the Sugester system.
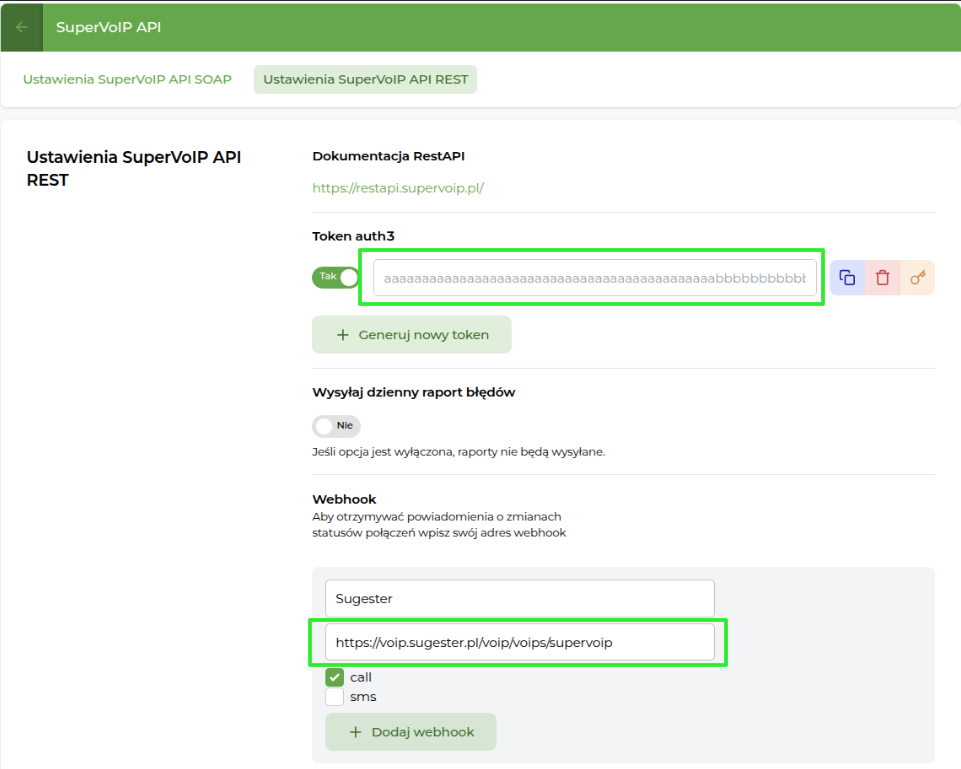
2.2. Generating the API Key
- In the SuperVoIP panel, go to:
Finance -> Packages and Services -> Services -> SuperVoIP API -> SuperVoIP API REST Settings - Locate the Token auth3 field.
- If the token does not exist - generate it.
- Copy the generated API key - it will be needed in the next step.
3. Configuration on the Sugester Side
3.1. Adding the SuperVoIP API Key
- In the Sugester panel, go to 4 dots -> VoIP section -> VoIP Settings -> Edit
- In the API Key field in the SuperVoIP section, paste the previously generated API Key
- Save the settings
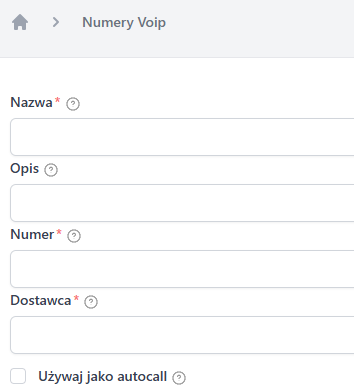
3.2. Adding VoIP Numbers
- In the Sugester panel, go to the VoIP section -> VoIP Numbers
- Select the + option
- Fill in the following fields:
- Name - any name identifying the number
- Number - phone number (matching the number from SuperVoIP). Add the number as a continuous string without spaces and special characters.
- Provider - SuperVoIP
- Description - optional field if you need to insert a description for the number
- If the number is to be linked to the autocall widget, check the Use as autocall checkbox
- Save the number.
3.3. Adding SIPs
SIP data is retrieved directly from the SuperVoIP panel.
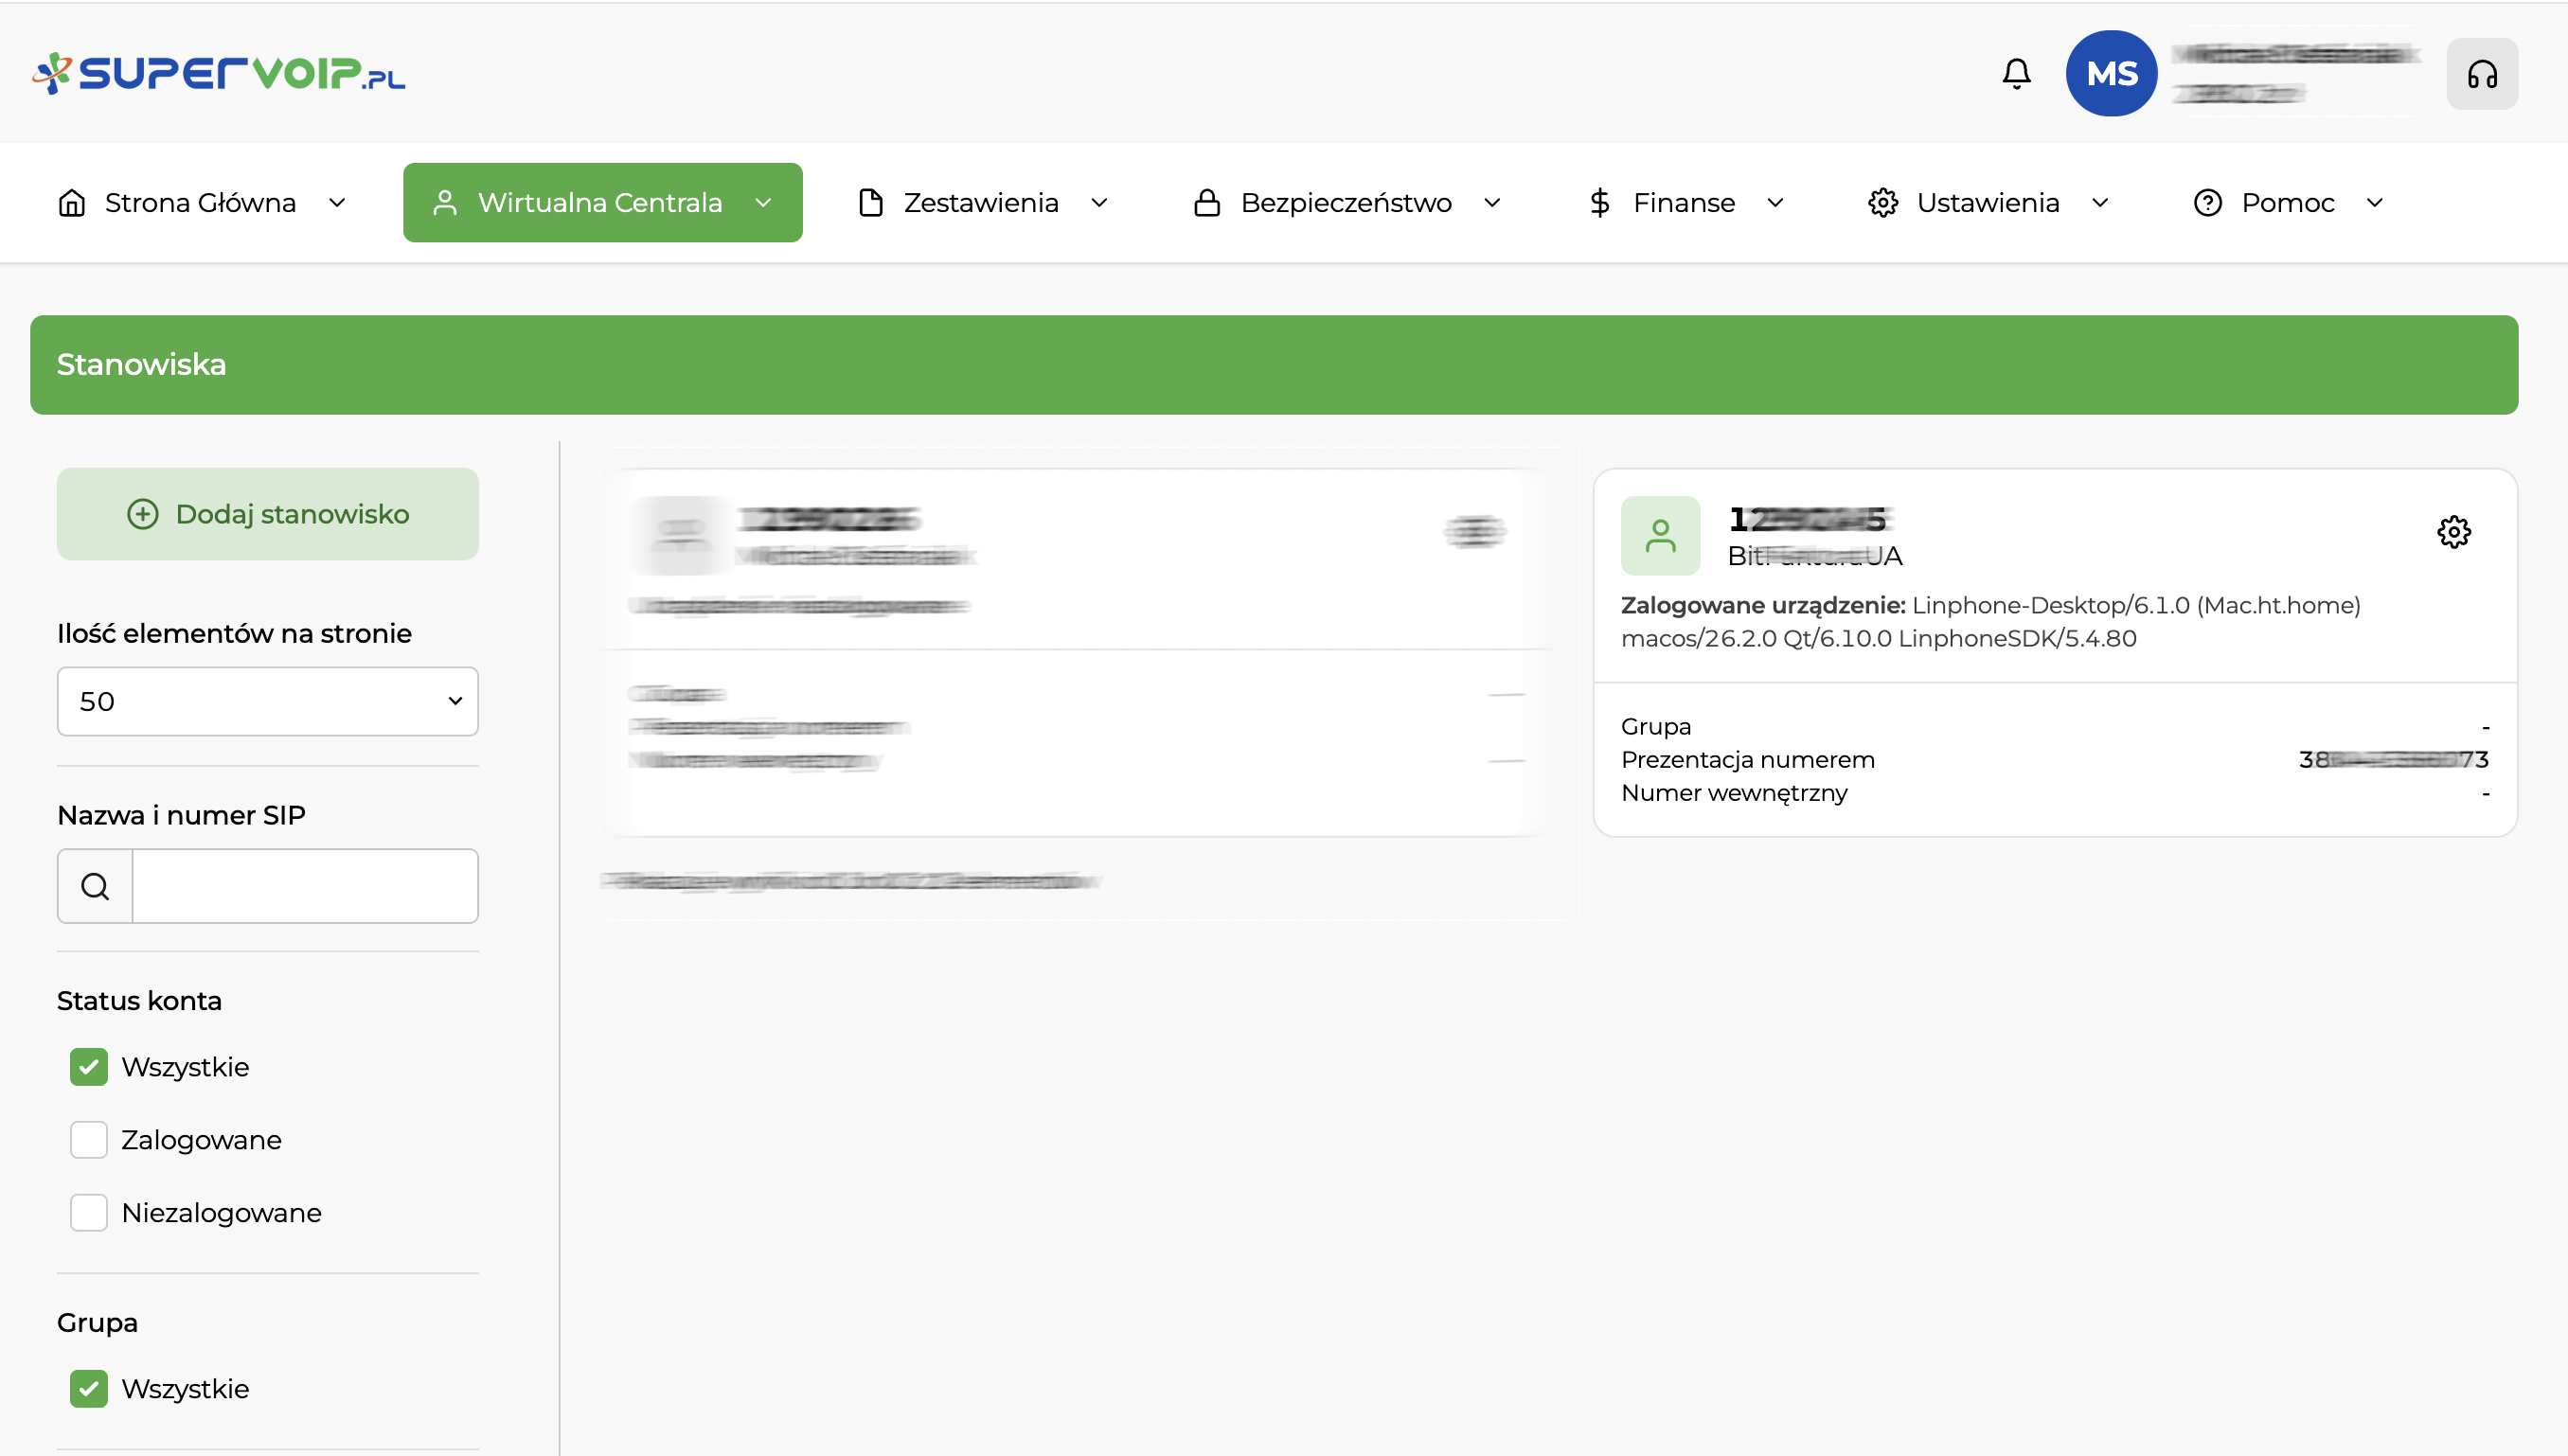
- Log in to the client panel in SuperVoIP.
- Go to:
Virtual PBX -> Workstations - Read the workstation data (SIP).
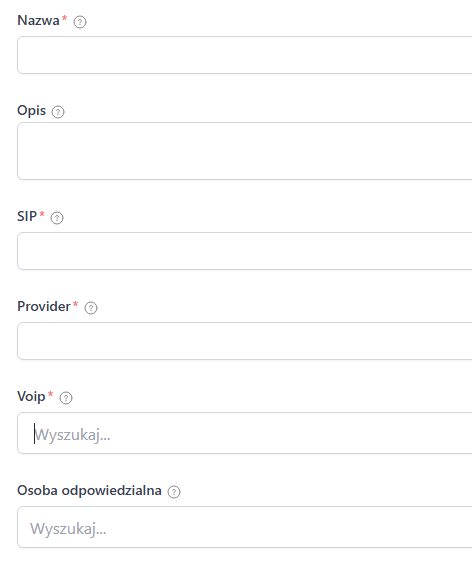
3.4. Configuring SIP in Sugester
Go to 4 dots -> VoIP -> SIPs
When adding a SIP in Sugester, fill in:
- Name - any name identifying the workstation
- SIP - SIP account number (from the workstation in SuperVoIP, e.g., 1290245)
- Provider - select SuperVoIP
- VoIP - select the VoIP number to which the SIP is assigned
- Responsible person - Sugester user handling the given SIP
4. What Next?
After configuring SuperVoIP in Sugester, the next step is to install and configure a call handling program (softphone). This will allow you to make and receive calls directly from your computer.
You can find detailed instructions in the article: Call handling program (softphone)