Ticket View - Client Page
The helpdesk widget allows clients to view their tickets and communicate with support.
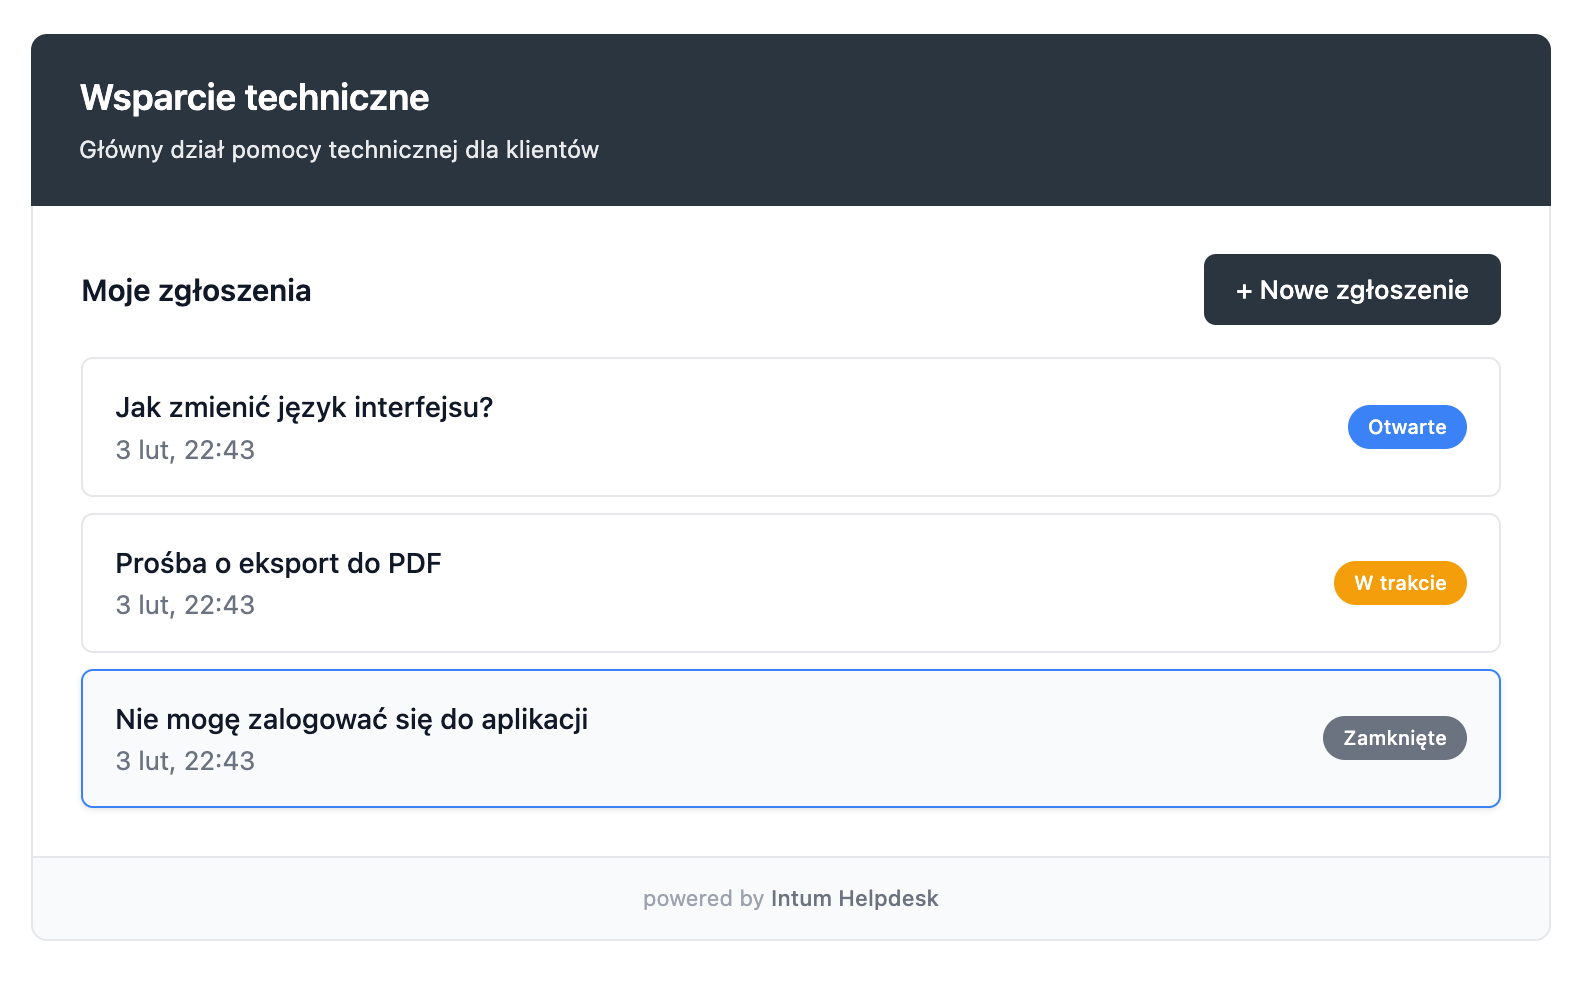
Client Ticket List
Upon entering the page with the widget, the client sees a list of their tickets along with their statuses. Each ticket shows:
- Ticket title
- Creation date
- Current status (colored badge)
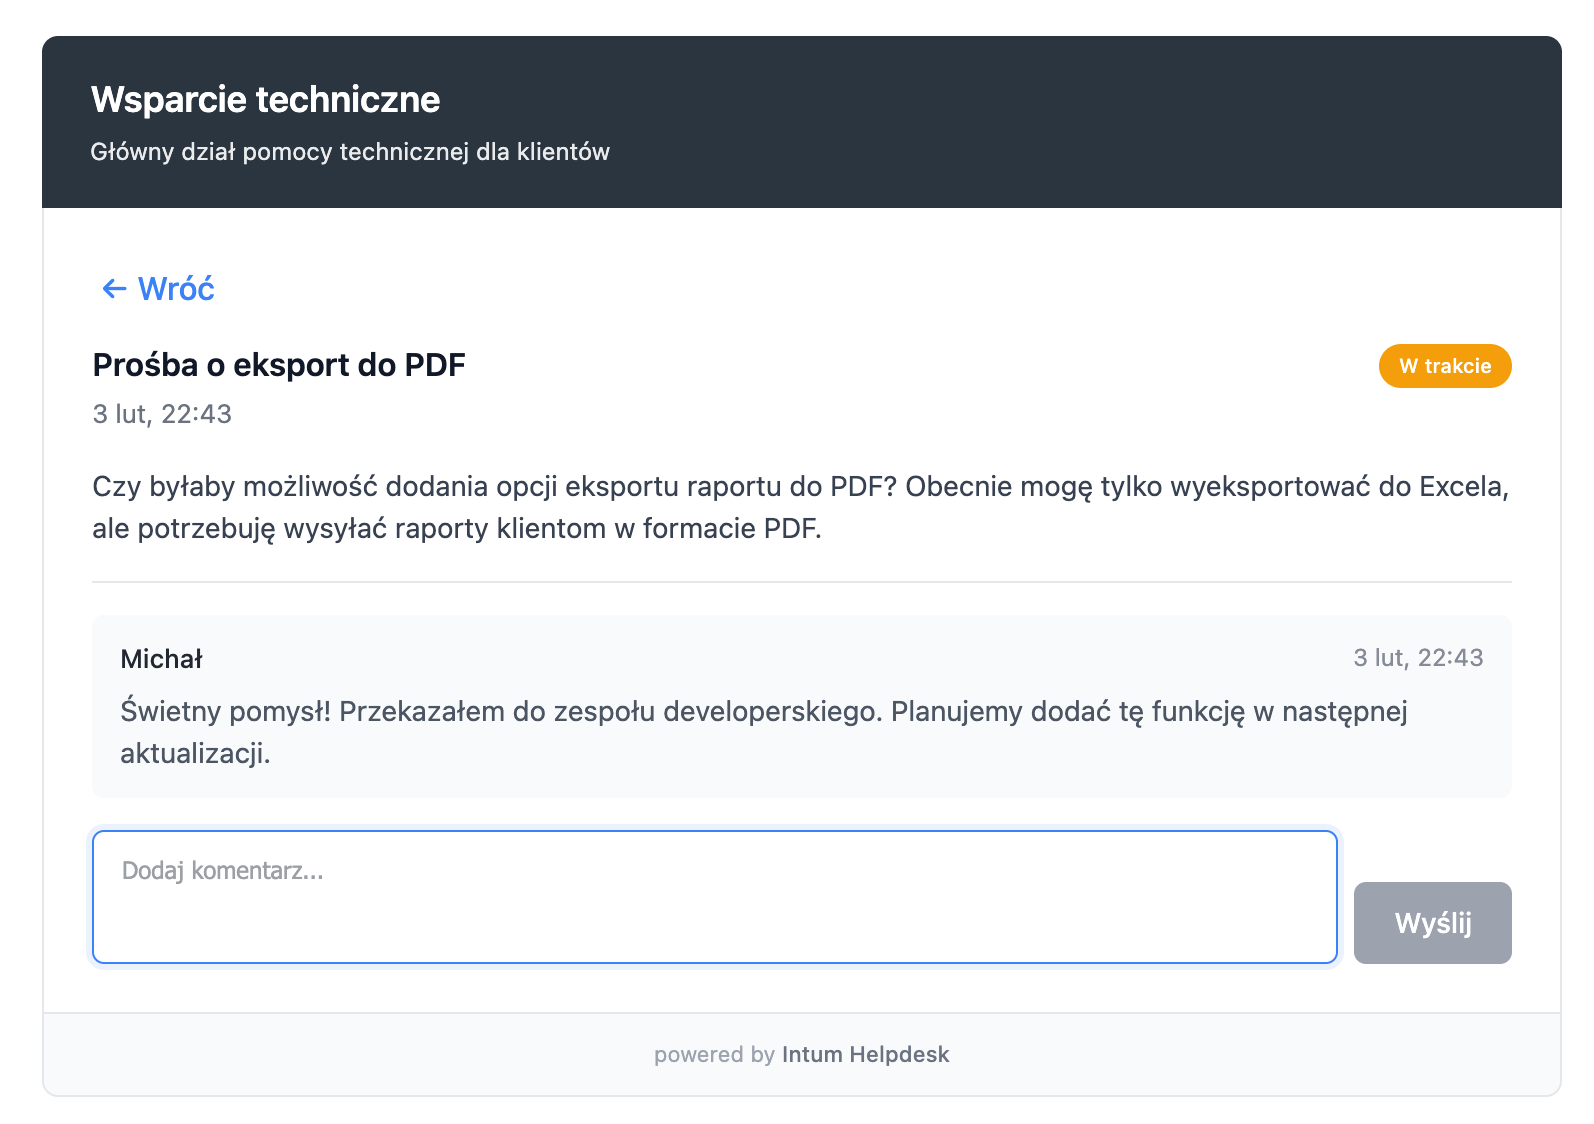
Ticket Details - Client View
By clicking on a ticket, the client sees the full conversation history:
- Title and content of the original ticket
- Status and creation date
- List of comments highlighting who the author is
Comments are visually differentiated:
- Support replies - blue background with a blue bar on the left
- Client messages - gray background with a gray bar on the left
At the bottom, there is a field to add a new comment.
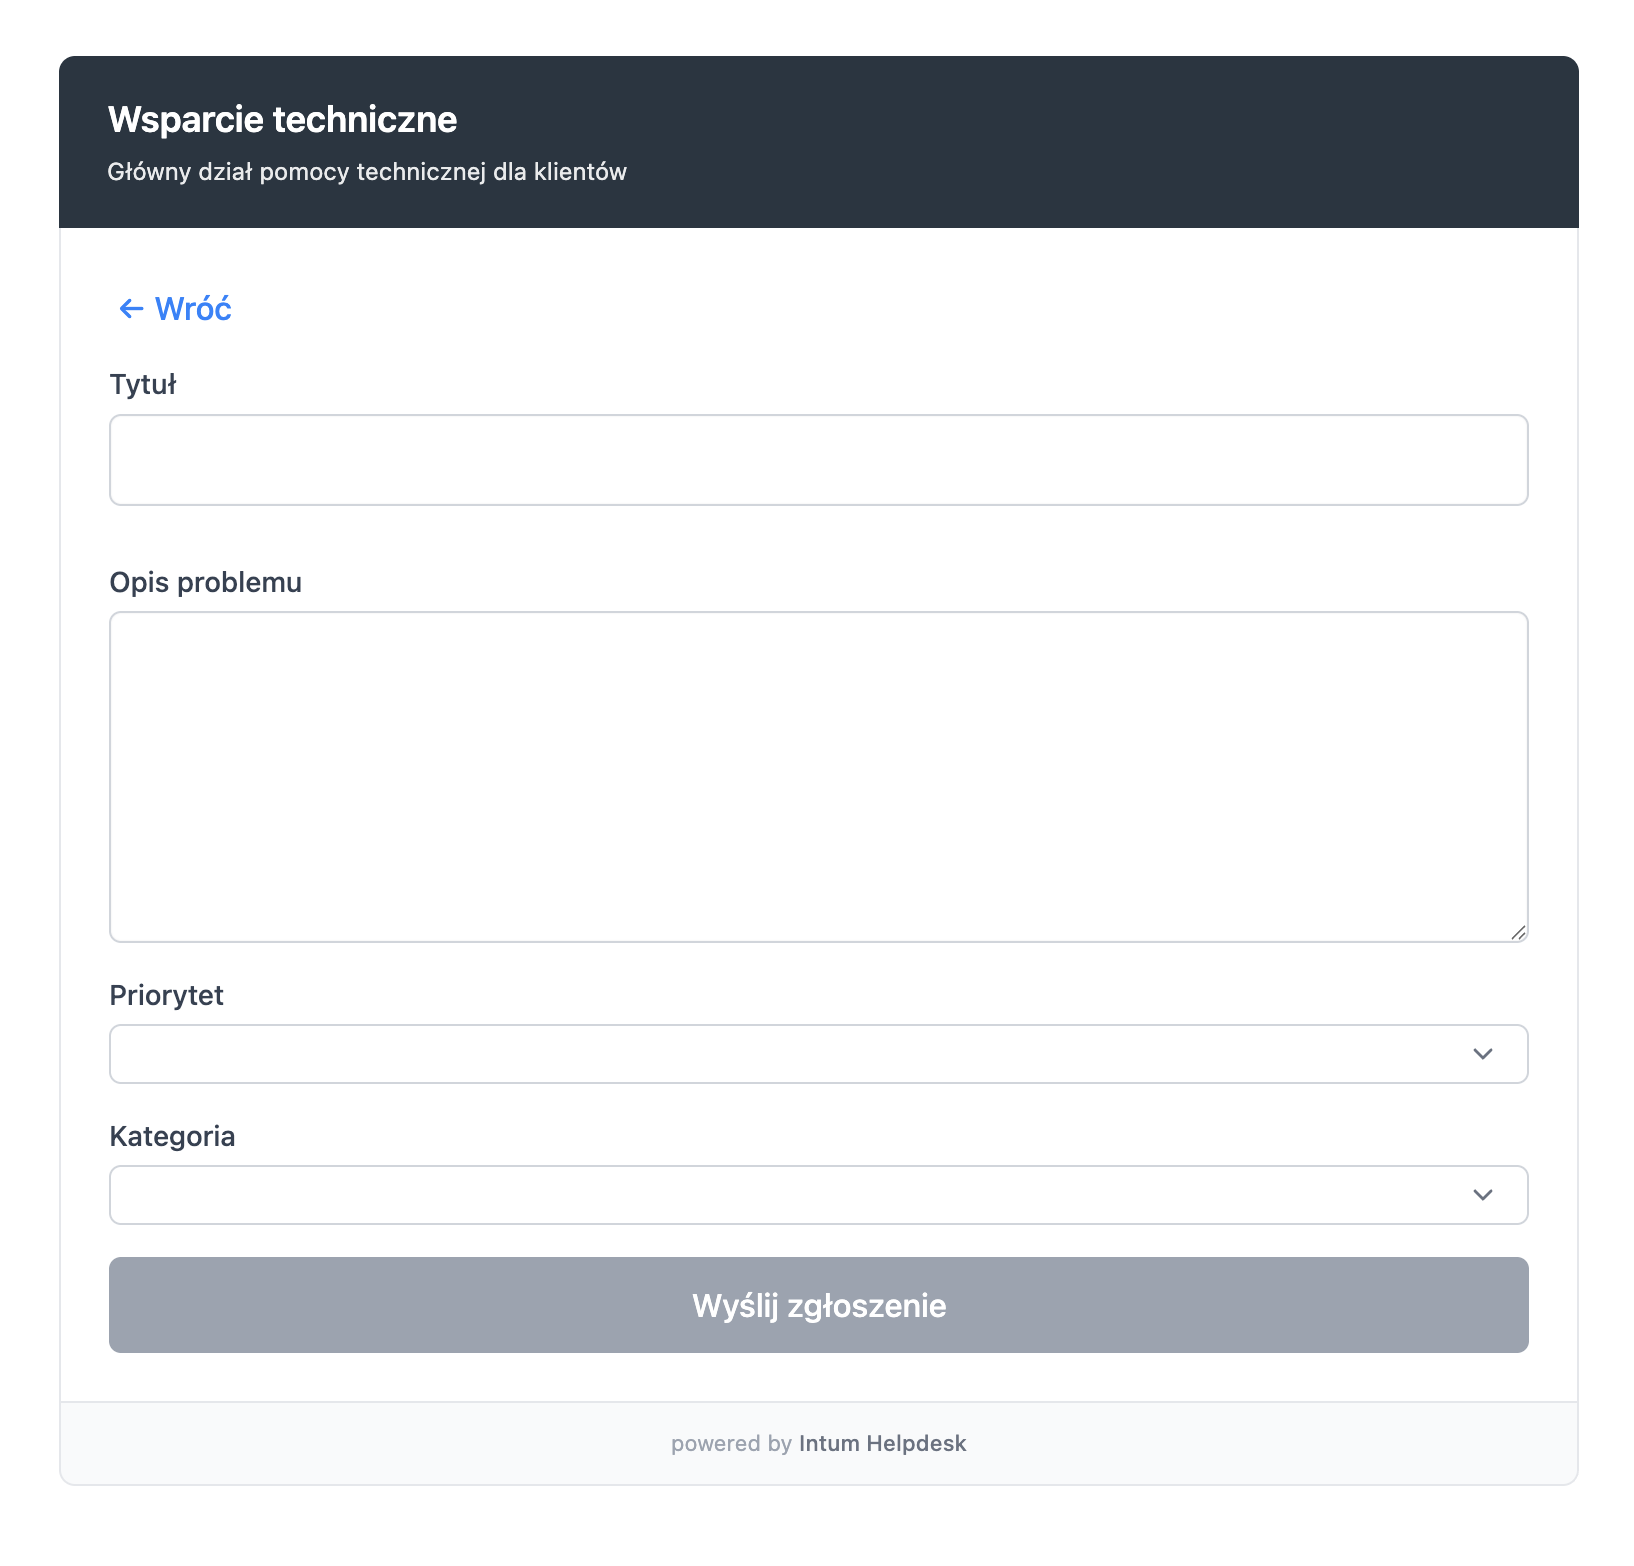
Creating a New Ticket
The client can create a new ticket by clicking the + New Ticket button. The form includes:
- Ticket title
- Content/description of the issue
- Priority (optional)
- Category (if configured)
Public Ticket Link
Each ticket has a unique public link that allows the client to access the ticket without logging in and without the widget.
How Does the Public Link Work?
- The link contains a unique ticket token (e.g.,
/helpdesk/ticket/abc123xyz) - The client can open the link in a browser and see their ticket
- Through the public link, the client can view the history and add comments
- The link is automatically sent in email notifications (variable
{{ticket_url}})
When to Use the Public Link?
- When the client does not have access to the widget on the page
- In email communication - the link allows the client to respond quickly
- For clients who prefer direct access instead of the widget
Ticket View - Operator Panel
The operator panel allows for comprehensive ticket management.
Ticket List
In the Helpdesk panel, you see a list of all tickets with filtering and sorting options:
- Status, priority, and category
- Client data
- Creation date and last update

Ticket Details - Operator View
The ticket details view includes:
Left Column - Main Content:
- Status and priority (colored badges)
- Ticket content
- Action buttons (Resolve, Close, Reopen)
- Comment history highlighting authors
Right Column - Metadata:
- Category and assigned employee
- Client data (email, name, external ID)
- Source information (widget, email)
- Related tasks
- Activity history
Comments in the Operator Panel
Comments are color-coded:
- Support replies - blue background, visible employee name
- Client messages - gray background
- Internal comments - yellow background with the label “Internal” (visible only to employees)
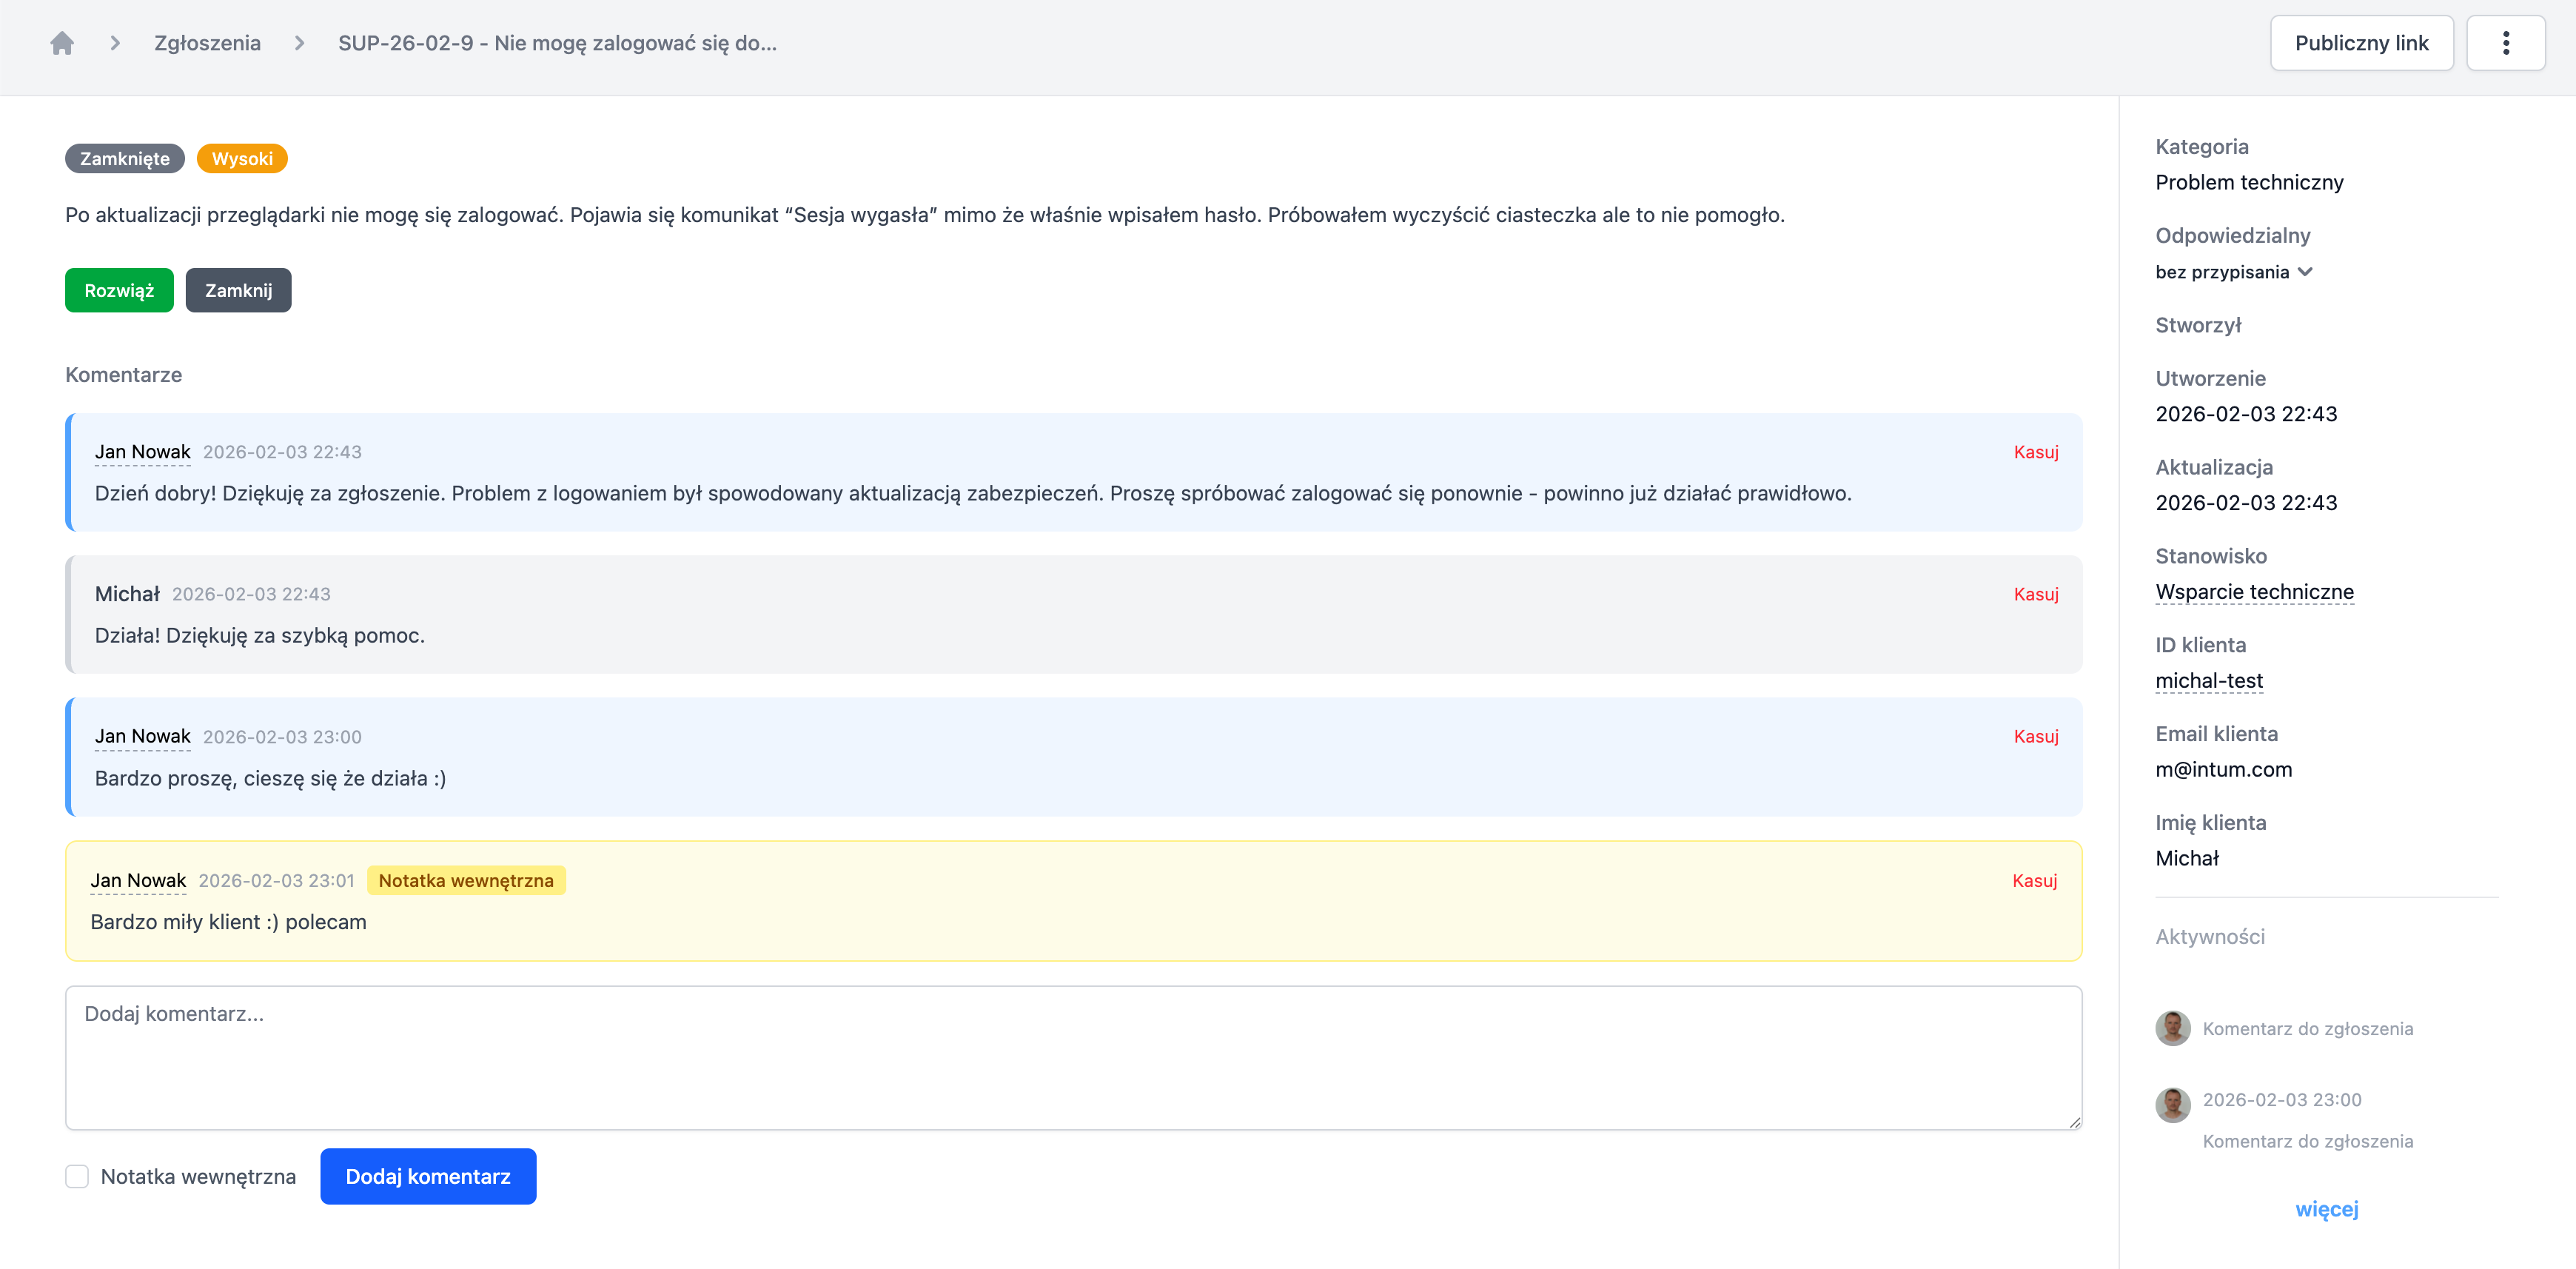
Adding a Comment
The operator can:
- Add a reply visible to the client
- Mark the comment as internal (visible only to the team)
- Send an email notification to the client (if configured)
Related Tasks
From the ticket level, you can create and manage tasks in the Organization module.
Creating a Task from a Ticket
Click the Add Task button in the ticket view. The system will create a new task:
- The task title will be automatically filled with the ticket title
- The task will be immediately linked to the ticket
- After saving the task, the link will be visible on both sides
Linking to an Existing Task
Click + Link Task and search for the task by name. Multiple tasks can be linked to one ticket.
Managing Links
- The list of related tasks is displayed in the right column of the ticket
- Closed tasks are displayed with a strikethrough
- Clicking on the task name opens it in the Organization module
- The link can be removed from the ticket level or from the task level
- The task card also shows the list of related tickets